![Haley [Badenhop] Leeper Art + Murals](http://images.squarespace-cdn.com/content/v1/5e0fae87f806fb45852bf868/816f25c5-e94c-4720-8512-41b0bb640871/Haley-BADENHOP-leeper-Logo+3.png?format=1500w)
MURAL TIP #7 | How to Create a Removable Mural
Two of my clients in the last 2 months requested removable murals. I wasn’t sure how to go about it, but it turns out, there are a number of options! Since people move a lot more these days than they used to, painting “removable murals” are a great option. By the way, if you want more info about murals, check out my full mural courses HERE.
There are 3 common ways to Create Removable Murals
Masonite drilled to the wall
Polytab or Parachute Cloth
Canvas
Masonite
I’ve created two murals using this type of board. Both clients wanted removable murals that they could take with them if they moved houses. I had them buy and hang the masonite before I got there because it’s a bit of a process to get those heavy sheets hung perfectly on the wall (find a construction friend!).
Once they are up, you paint them as though they are the wall. Prime with a couple of coats of paint to match the wall color and paint like normal. It’s a wonderfully smooth surface, and at the end, you almost can’t tell it isn’t the wall (if you get the 1/8” size.)
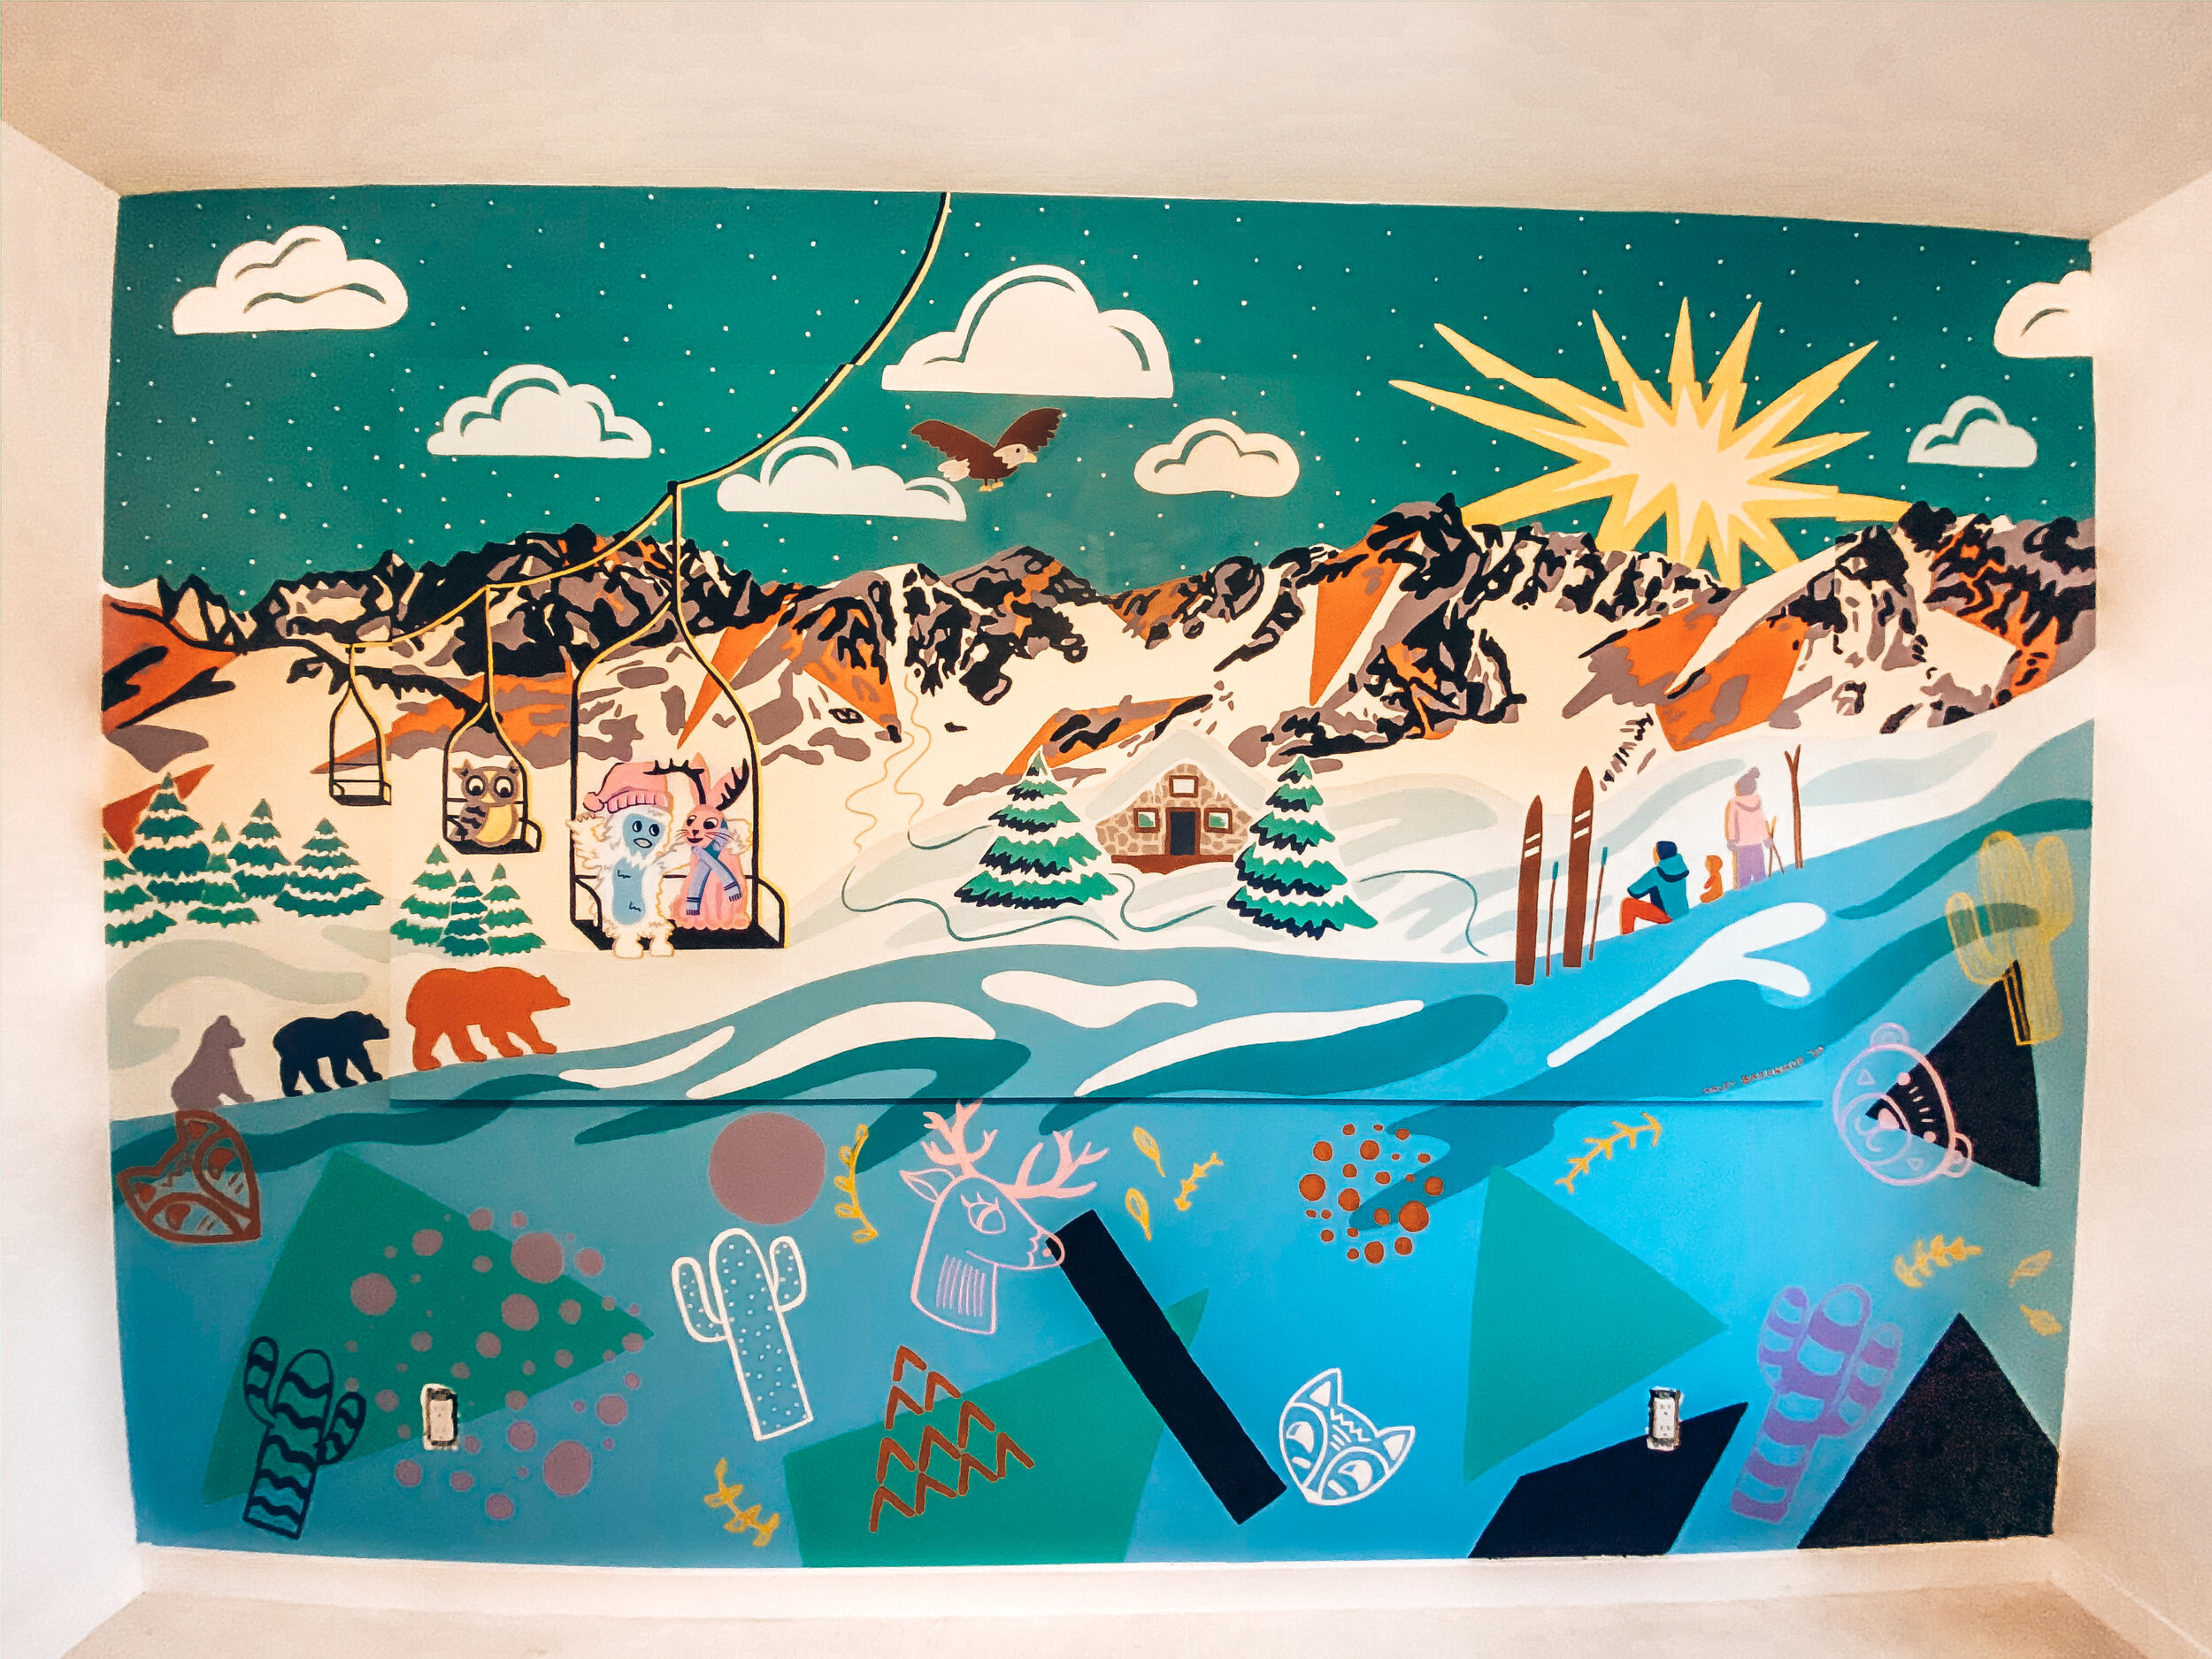
Here’s a peak at my latest masonite wall mural, can you spot the 8’x4’ sheet of masonite?
Polytab
This cloth is non-woven fabric that is typically primed with a coat or 2 of high-quality interior / exterior primer. You then would paint your mural on with almost any paint and media on top of the primed side. Then you adhere it to a wall using an acrylic gel medium (like Nova gel.)
I went to school for Fashion Design and was so pumped to find out that I actually know what this elusive fabric is: Interfacing!! Now, that probably means nothing if you haven’t made any of your own tailored clothing (haha) so if you’re confused, that’s totes fine:) However, interfacing is what you would use in a collar so that it stays stiff. It’s basically a white, lightweight, webbed fabric. So that was my fun fact of the day.
Continuing on, the great thing about this fabric is that you could paint it in your own space and send it to a client to be hung like wallpaper.
You can also get your artwork printed on this fabric and have it hung afterwards, although that, of course, takes away the artsy part of painting!
Canvas
If you want to use canvas for your mural, it will be heavier than polytab, but just as convenient. I’d suggest buying pre-primed canvas, because who the heck likes to prime anyways?! You’ll paint the canvas just like you would if you were simply painting a canvas framed piece, and let it dry.
Once its ready to be hung, it’ll be like you’re hanging wallpaper (although, that’s an ancient technique too, isn’t it?) so you need to apply clay-based wallpaper adhesive to the back of the canvas and to your wall, give it a minute to set, and then put your canvas in place on the wall. You’ll want to use a brayer (a roller-type thing) to make sure you get it flat against the wall as it’s being adhered. Boom!
Don’t let the Unknowns stop you from Painting!
Mural painting can get a little confusing sometimes because of all the details that might be involved. But if you take it one step at a time, it’s totally possible to create ridiculously awesome creations. So try out something new, like a removable mural!!
If the unknowns are stopping you from taking on bigger projects, my course “Paint Murals Like A Pro” will take you step-by-step down the all-the-things-about-murals path and give you all the resources you need to feel confident. check out my mural courses HERE, or add your name below to get on my list for updates.